Monday 24 October 2016

Week 5 - Materials Part 1


This practical was all about materials:

Specular - This is a good way to get a metal type look to your models, it will be very useful in some of my star wars models as there are many metal parts on some of them.


Bitmap - An easy way to add images to your objects, this can come in useful later if I find nicce textures for parts of my models however some of the textures do not quite fit around some objects, we will learn more about this later.


Bump Mapping - I will most likely use this to add extra details to my models such as the wings of my TIE fighter.

Displacement Mapping - This added much more depth and detail to the object however it does not always look as nice as bump mapping and the materials do not always end up where you want them (see below).


The hypershade window is very good for looking at all your materials and will be extremely useful when texturing my main models.

Wednesday 19 October 2016

Week 4 - F-16 Model

This week I worked on an f-16 model and learnt a lot of useful tips for when I start working on my X-Wing.


What I learned from this?

Overall the model is pretty accurate to the schematics, although I could have cleaned it up a bit and made it look nicer but it was just practice and I learnt a lot from making this. Some tools that were particularly helpful during this exercise are:

Edge loop - This tool was very useful when trying to create curves with vertex and helped keep the shape together especially with the top window.
X-Ray view - Very good for viewing the schematics behind the model, it would be very hard to follow the schematics without this setting.
Extrude - I have used this before with the polygon houses but it is worth mentioning again because unlike with normal edge loops, extruding helps create a separate section of a model to work with which helped with the back part of my model and will most likely play a big part when I'm making my final models.
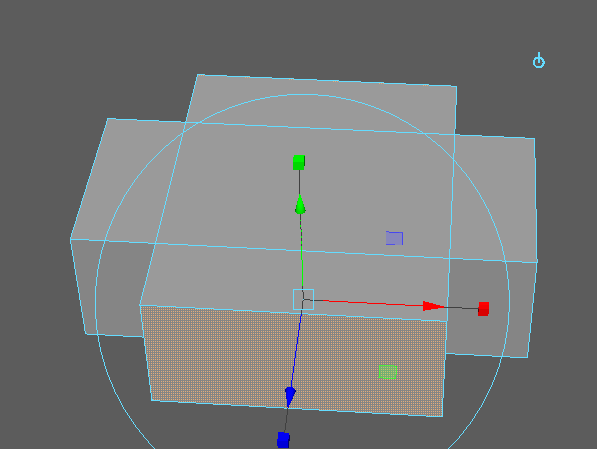
Vertex manipulation - This isn't really a tool but played a big part in creating this model, when edge loops are added so are vertexes and these are what I used to shape the model to the schematic shape.

Difficulties/Problems

The main difficulties for this exercise was moulding the window, I had a lot of trouble figuring out how to go about extruding a cylinder, in the end I used the global coordinates to extrude all the sides straight up and then edited the vertices to make the rounded shape. This is probably what I will do with my X-Wing model or I will extract the top window and work on it separately.

What Can I do better?

If I were to make this model again I would try to get a more rounded shape by using the smoothing tool somehow This would give a smoother finish to the model. Also I didn't use layers too much as I didn't have many layers to manage but I will use them when I create my main models as they are very useful when working on separate objects as you can hide other objects while you work on others.

Saturday 15 October 2016

Week 3 - Derelict Village

 Practical work

This week I've been playing around with some new tools in Maya trying to create models for a derelict village including:
  • Edge looping: This was a really useful tool when creating indents and extruding my buildings as it allowed me to accuratly create divisions all around the object
  • Multi Cut tool: I didn't use this as much as I would have liked to but it was good for drawing more detailed outlines for some of the window borders I used in the skyscraper (See picture below)
  • Extrude: This tool is probably the one I used the most of, I had a lot of issues with it at first as when I extruded outwards on my objects it connected all of the edges of my object together, I then found a setting called Keep Faces Together which solved the problem for me and was really helpful especially when creating the windows for my skyscraper.

                      < On    Off >


  • Division tools: I have used these before on the house model I made for last weeks practical but used it a lot again as it is a very uwseful tool for acuratly divising a face into sections. I used this on almost every window or door I created.
  • Boolean (Difference): I used these to make destroyed parts on my building as I found it the easiest way to do it.
  •  Snapping tool: this was a great way to align different objects without having to do it by eye which made the process faster and easier for me.
  • Bevel: I used this tool to make a nice look to the ends of my fence posts (See Building 1 below). I will be using this to get a nice rounded shape to the edge of some ships.
  • Materials: I found materials easy to use and keep track of in the hypershade window. I tried out different types like antisotropic for the windows and lambent for the other materials. The glass type feature will be helpful for the glass in my ships when I come to create them.
 Struggles
The main thing I found difficult throughout this process was getting used to extruding objects inwards and cutting objects out of other objects, this took me some getting used to but eventually it became easier the more I used the functions. Another difficulty was with loss of framerate due to lots of objects in the scene, to get over this I combined the objects together and the framerate returned to normal, this was mainly an issue with the skyscraper.


Monday 10 October 2016

Storyboard first draft


Storyboard
This week I've been working on my storyboard, this is the first draft.


Part 1
The scene starts off with a wide angle shot of the ship and cuts to a closer shot of the ship, revealing a TIE fighter from behind an asteroid. The scene then cuts to an over the shoulder shot of the TIE fighter and the asteroid slowly goes out of shot to  reveal a line of sight between the TIE fighter and the phoenix home. The camera then zooms out and follows the TIE fighter as it regroups with the others. They then go in for the attack and destroy one of the X-Wings, another x-wing comes in and destroys a TIE fighter then the second TIE fighter turns around and they destroy each other. Knowing that he has lost the fight the commander TIE fighter runs away but a hero X-Wing emerges from the ship and follows the TIE fighter in pursuit.  


Part 2
The camera follows the X-Wing as it fires off at the TIE fighter and follows it through asteroids, eventually it clips the wing of the TIE fighter and it spins out of control into an asteroid, the camera then zooms in on the TIE fighter as the X-Wing flys away and the light on the TIE fighter blinks back on, cut to black, END.


Overview
Now that the storyboard is complete, hopefully this will make it a lot easier when I come to animating my scenes and will make the process a lot easier especially with camera movement.

Wednesday 5 October 2016

Week 2 - Low Polygon House/Steering Wheel

This week I've been playing around with Maya to try and learn the basics of modelling using the software. I've created a simple low polygon house and a simple steering wheel which was fairly easy to make but has given me the fundamentals to start work on creating my Star Wars models.


What I learned?
Creating this house has taught me a few things including:
Selecting face, edge and vertex
Adding divisions
How to extrude objects
Multi-select
How to 'connect' two edges, useful for splitting an object

The main challenge I faced during this exercise was trying to connect the edges on the roof, in the end I found that the vertex tool was really helpful for connecting edges more accurately.


What I learned?
Creating the steering wheel I learned a few more skills:
Changing Pivot points
Snapping tool
Duplicating objects
Smooth tool for the ends of the steeling wheel


The main challenge for this was getting the sticks on the wheel to line up at perfect angles to the wheel, in the end I used the snap tool along with moving the wheel by typing in numbers into the position axis instead of doing it by eye, this mean I could do one side and just write the negative axis to copy it to the other side and it would be in the exact place.